Instructions to enable second-factor authentication
The instructions below require access to the Digital Identity Management platform.
If you haven’t already, activate your account by following the instructions here: IdP in the Cloud Account Instructions.
Follow the instructions below to enable second-factor authentication within your account.
Setup steps
-
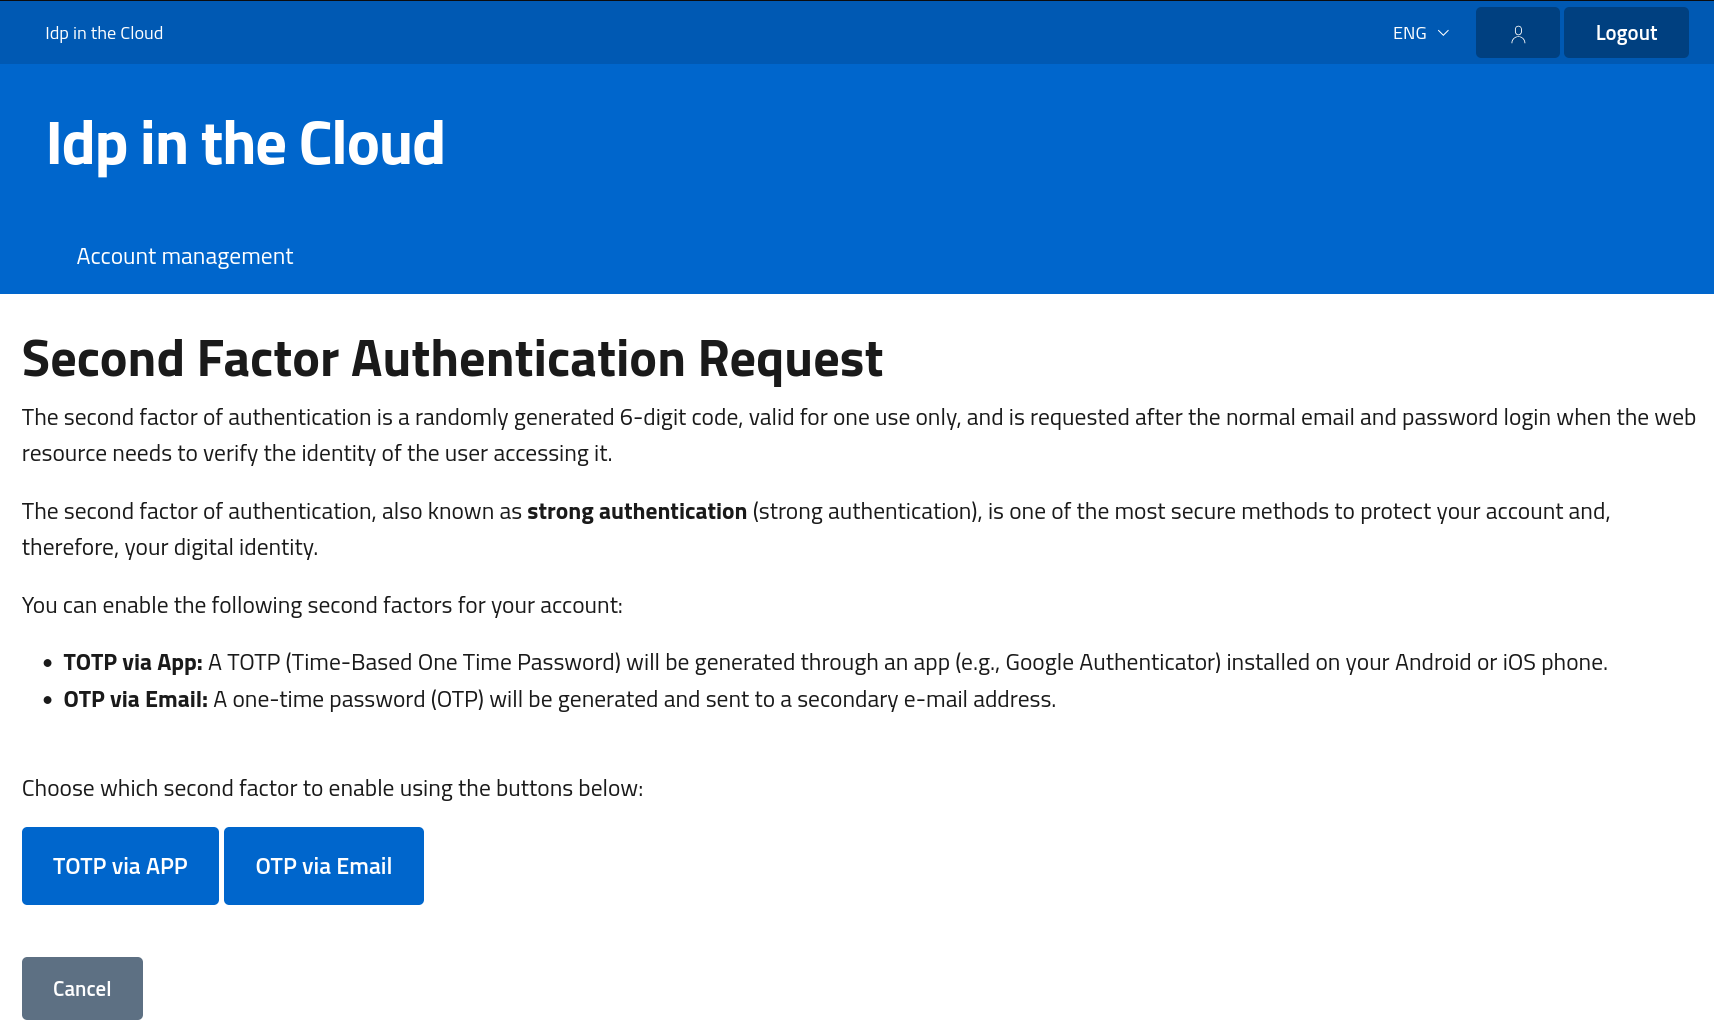
Move to the Account Management page and click on Two-Factor Authentication Request in the Actions menu.
-
Once redirected to the new page, choose which type of second factor you want to enable. You can also enable both.
-
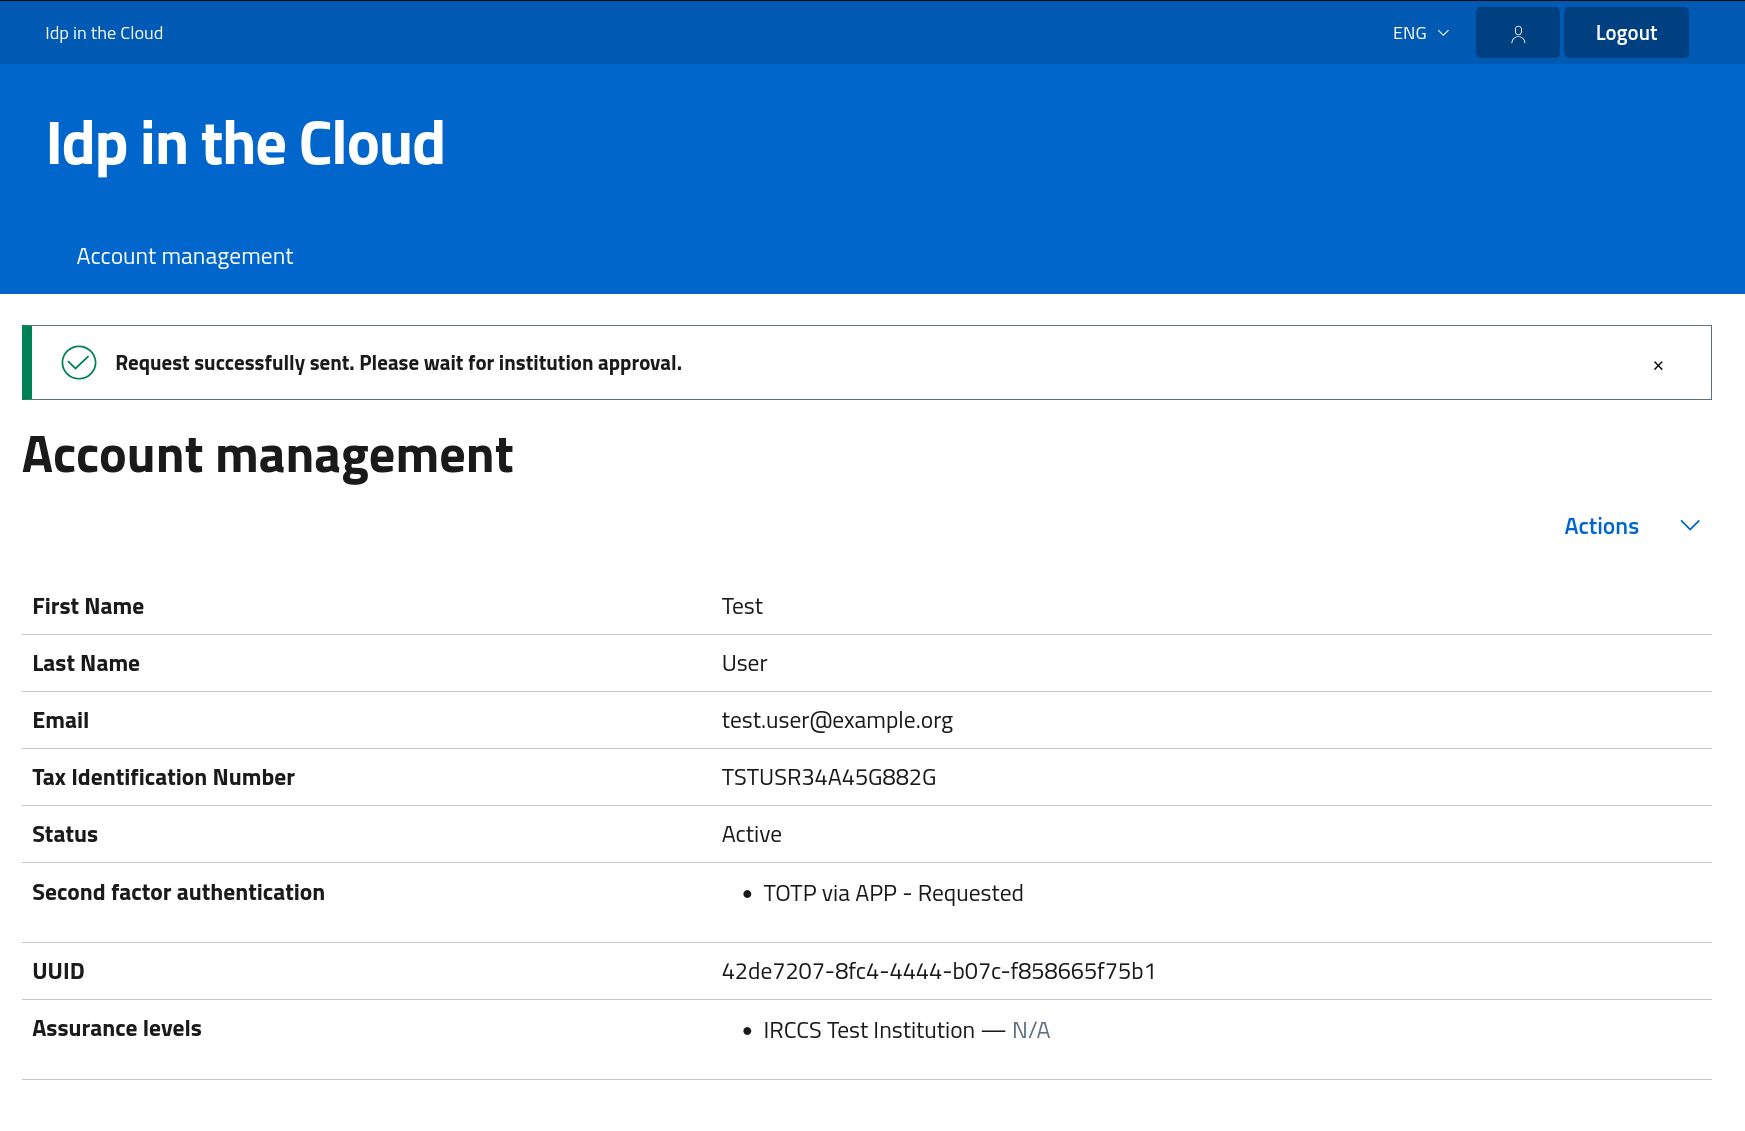
Once you enable a second factor (e.g., TOTP via APP), you will receive a message indicating whether the request was successfully sent.
-
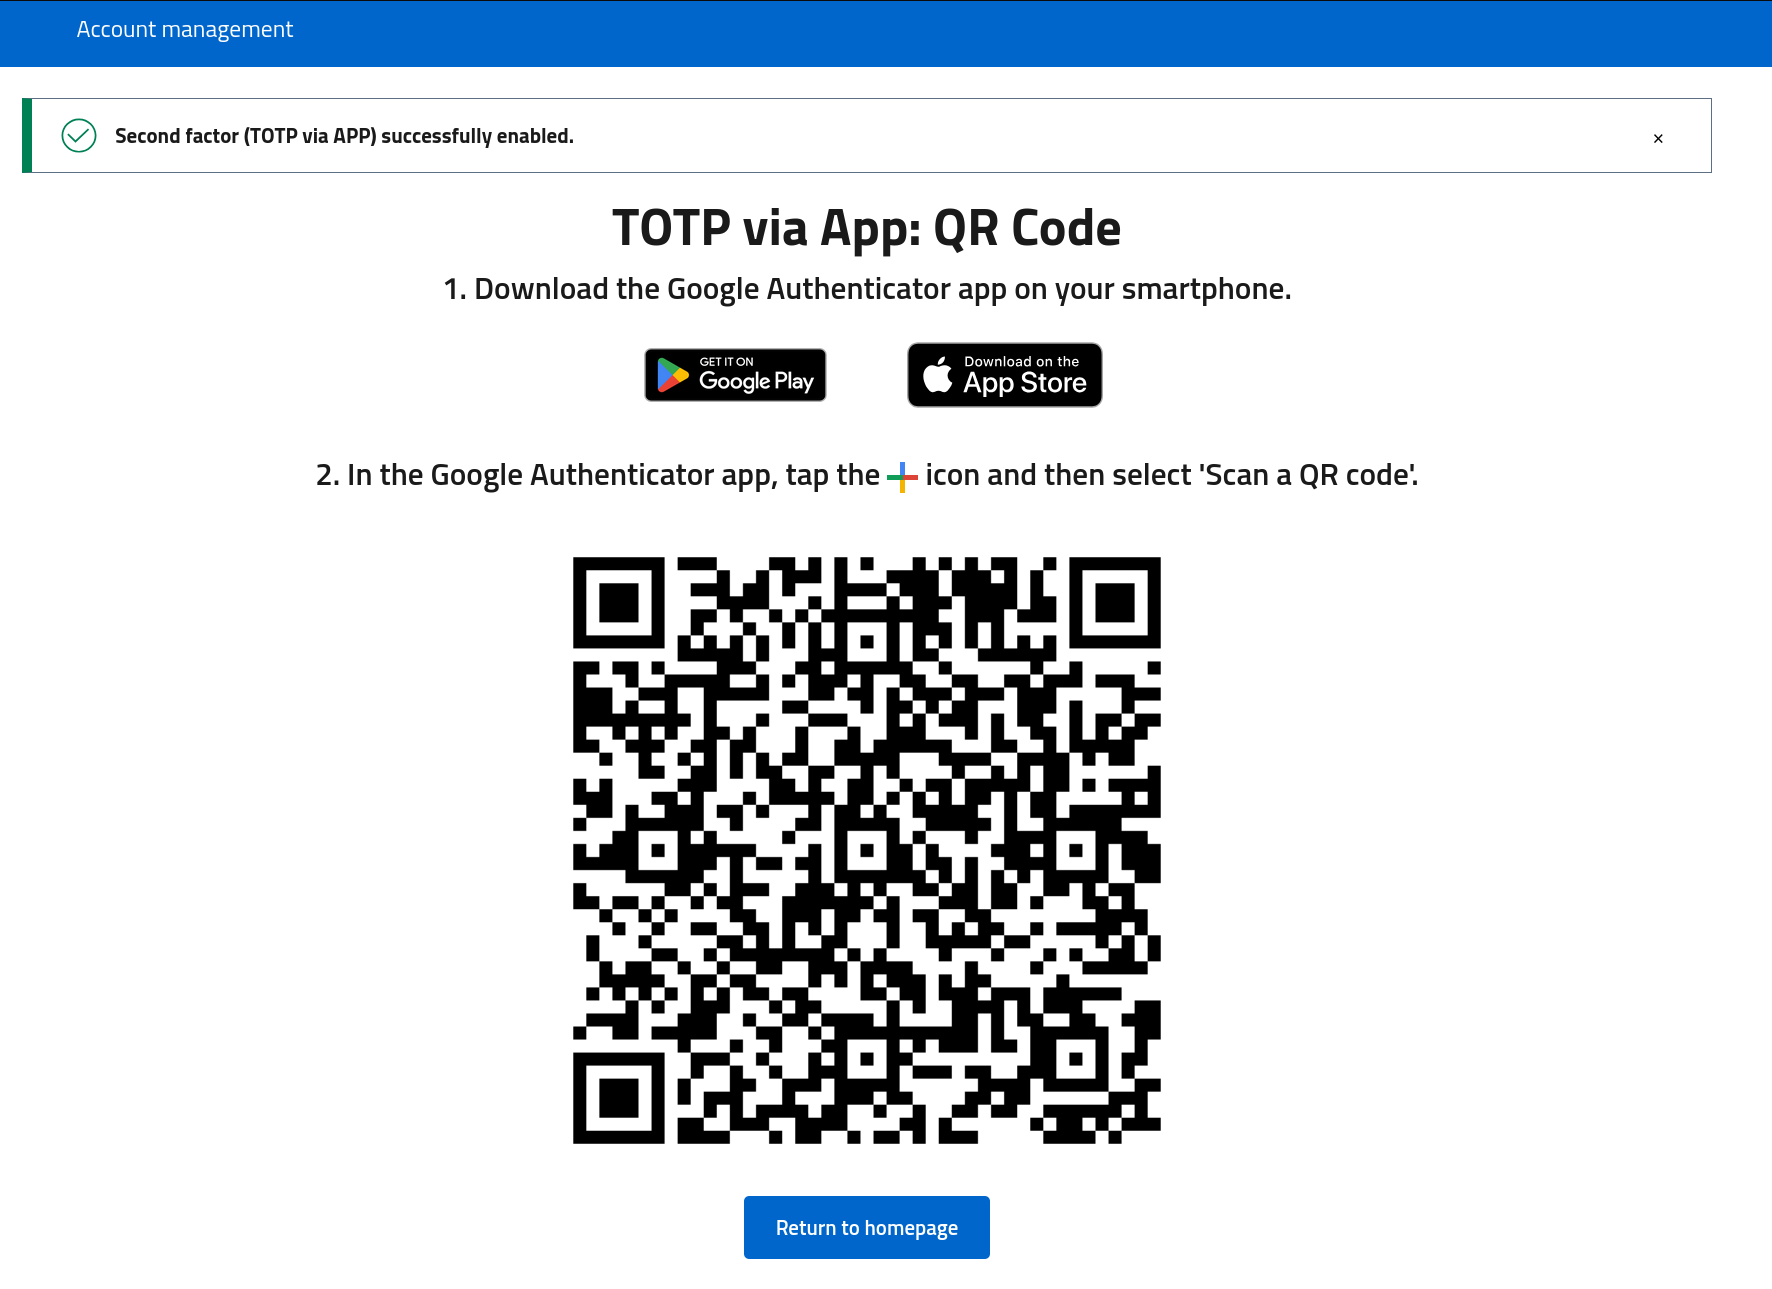
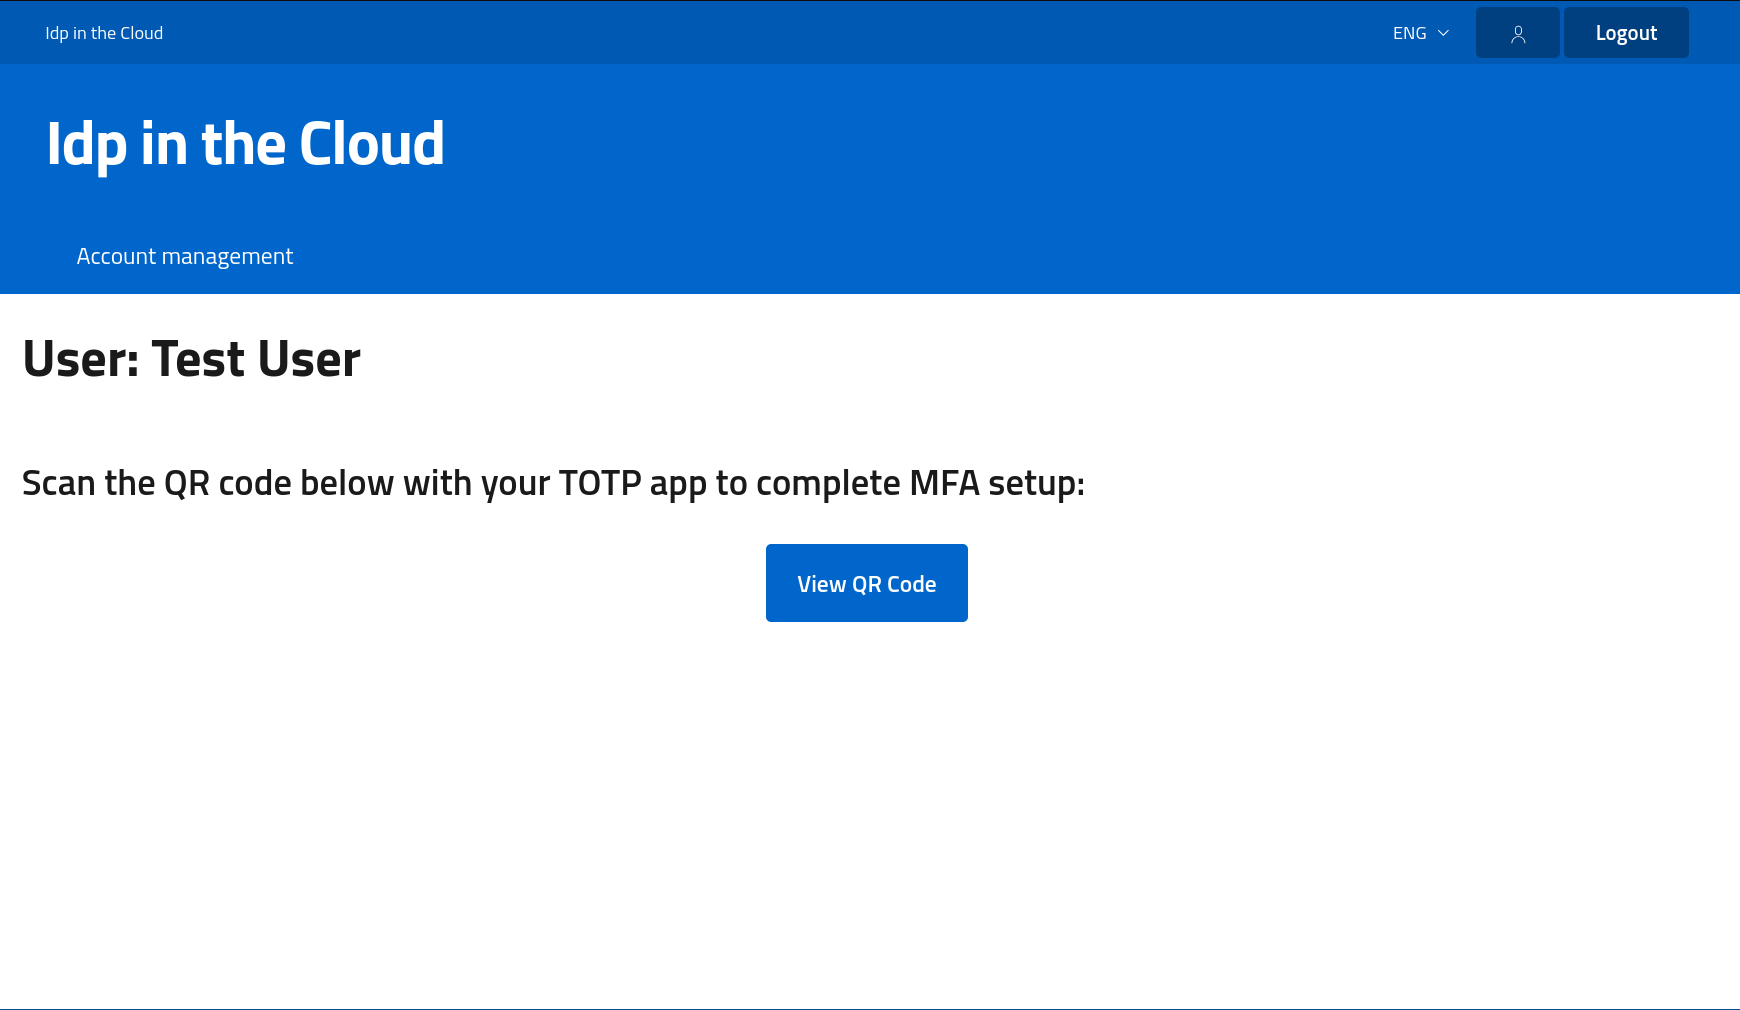
As soon as the administrator of your institution approves the request, you will receive an email containing a link to view the QR Code. After clicking the link inside the email, you will be redirected to the page that allows you to view the QR Code. Warning: You can view the QR code only once. Do not close this page before scanning it with the Google Authenticator app.
-
By clicking the button View the QR Code, the system will display the QR code to scan with your Google Authenticator app: to be entered in your Google Authenticator app: